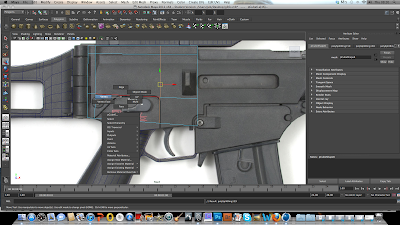
Here are some images showing how I modeled the G36C rifle using photo referencing.
Here shows the image plane on the 'Front View' camera. This makes it easy but effective to line up shapes in order to fit the correct proportions of the image.
In this image, I am beginning to make the main casing of the rifle. For this I used the create polygon tool without interactive completion. This enabled me to control the proportions of the shapes. I chose a basic square shape to begin manipulating for this part of the gun.
Once I had made the basic shape for the casing, I then needed to add new vertexes so I could manipulate the shape of the square so it mimicked that of the rifle image in view. To do this I selected the 'Insert Edge loop tool' button.
What I am doing here is lining up the newly inserted edges into the correct locations of the image plane. For example, I am lining up the edges with sections of the gun that have certain details and compartments.
To make the mesh cleaner and more efficient, I selected the vertexes on the edge and used the scale tool to bring them together into one straight line.
Here is the edge after I used the scale tool on it. Keeping Edges as straight as possible will make a nice clear and clean mesh, that will make it more practical to manoeuvre around.
I then used the vertex tool to match up the vertexes to the imagine plane. You can see here how I move the vertexes around the edging of the handle.
Here is what this section looks after I have been using methods listed above.
For this part of the gun, I extruded the inner chamber to make that section 3D. However, I wanted to make it look neater and smoother. So I bevelled it, which unfortunately made the mesh a little messy.
To fix this, I deleted the shapes around the chamber that were incorrect and messy. I then selected the split polygon tool to recreate the mesh in an efficient manner, This would then make it better to bevel
Here is the chamber showing the removed messy mesh.
In this image we can see how I've sorted the mesh accordingly, so every vertex has an edge matched up to it.
Now that the mesh has been improved, I then re bevelled it the edges around the chamber.
Here is the bevelled chamber. Much better!
I then used the merge vertex tool to make certain parts of the mesh more efficient in it's shape.
Here is the process of the merging of vertexes.
There! a nicely bevelled chamber with an efficient and attractive mesh.
Here is what the chamber looks like with the mesh not visible. Bevelling really makes the gun have a nice smooth but detailed look.
Here is a little update of the rifle after I repeated the methods listed above. Controlling the vertexes on the models, bevelling, merging, split poly and extrude tools were the most useful for all my gun models.
Here is another update with the barrel added using extrusion and bevelling.
Here is the finished and finalized model of the G36C rifle. Perspective 1
I really enjoyed modeling guns for this project, as I most definitely was able to expand my skills and knowledge of building. Using the front view image plane and physically drawing up shapes, I was able to accurately model sections that I would've found more challenging in the past. I have also understood the importance of detail, accuracy and proportion when making guns. It really was a good decision in terms of improving my 3D modeling skills, as guns are very accurate objects.


No comments:
Post a Comment